You’ve just driven home in your brand-new electric vehicle, and your garage sits dark and ready. But one question keeps nagging you. Should you install a 30 amp or 40 amp charger? That decision feels technical, but it shapes everything. Your morning routine, your monthly budget, even your peace of mind when you need a quick turnaround. I’m here to walk you through this choice like a friend over coffee, cutting through the jargon so you can charge with confidence.
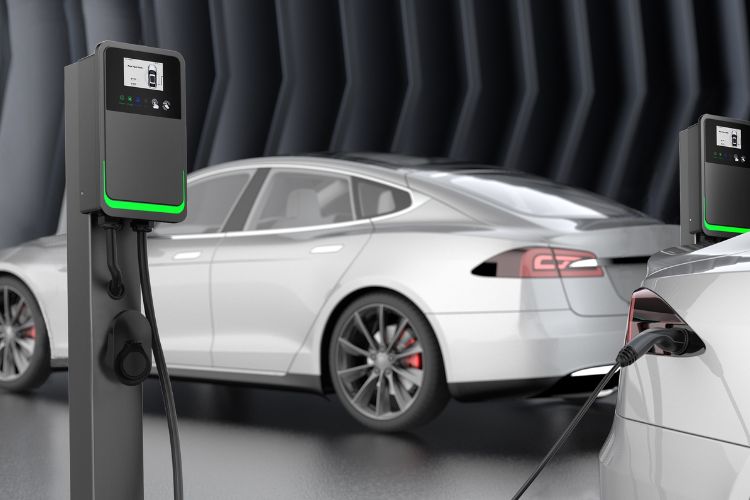
Keynote: 30 Amp vs 40 Amp EV Charger
A 40 amp EV charger delivers 9.6 kW, requiring a 50 amp breaker and 6 AWG wire, charging 30% faster than 30 amp units (7.2 kW, 40A breaker, 8 AWG wire). Choose 30A for predictable overnight charging, 40A for large batteries or irregular schedules.
Why This Decision Matters More Than You Think
The choice that’s keeping you up at night
You’ve made the leap to electric, and now your garage needs to catch up. Those two numbers, 30A versus 40A, feel like alphabet soup wrapped in electrical code. But they actually dictate how fast your car refills and whether your home’s wiring can handle the load without expensive upgrades.
Here’s the truth: most homeowners never realize that a “30 amp charger” doesn’t plug into a 30 amp circuit. It needs a 40 amp breaker because of something called the NEC 80% rule for continuous loads. That 40 amp charger? It demands a full 50 amp circuit. I’ll help you cut through the confusion so you can charge with confidence and avoid costly mistakes.
What these amps really mean for your morning routine
Think of amps as water flowing through a hose. More amps mean faster battery fill-ups, plain and simple. A 30A charger delivers roughly 22 to 25 miles of range per hour of charging. A 40A unit pushes 28 to 35 miles in that same hour.
But here’s the catch: speed isn’t everything when your car sits plugged in all night long. Most drivers plug in around 9 PM and don’t leave until 7 AM the next morning. That gives you a solid 10-hour window. Both options easily top you up before sunrise, so the real question becomes whether you need that extra speed for unusual days or rapid turnarounds.
The Numbers Game – What 30A and 40A Actually Deliver
Power output decoded for real humans
Let me break down the power delivery in plain language. A 30A charger pumps out approximately 7.2 kW at 240 volts. A 40A charger delivers 9.6 kW. That 10 amp jump translates to roughly one extra hour of freedom in tight schedules when you need a fast afternoon top-up. But here’s something critical: your car’s onboard charger sets the ceiling. No wall unit can break through that limit. Many mass-market EVs max out at 7.0 to 7.7 kW on Level 2 AC charging, which means a 30A and 40A charger perform identically if your car can’t accept more than 7.2 kW.
| Charger Rating | Actual Sustained Output | Power at 240V | Miles Per Hour | Required Breaker |
|---|---|---|---|---|
| 30A | 24A continuous | ~5.8 kW | 22-25 miles | 40A |
| 40A | 32A continuous | ~9.6 kW | 28-35 miles | 50A |
Time savings you’ll actually feel
Let’s talk real-world charging windows. With a 30A setup, expect 5 to 6 hours to charge a standard 60 kWh EV battery from 20% to 80%. A 40A charger often shaves an hour or more off that window, bringing you down to around 4 to 5 hours. If you’re charging overnight, both options easily top you up before sunrise.
The speed difference becomes noticeable only when you’re doing a midday recharge before evening plans or when you’re dealing with a massive 100+ kWh battery pack like the ones in the Rivian R1T or Ford Lightning Extended Range.
| Battery Size | 30A Charge Time (20%-80%) | 40A Charge Time (20%-80%) | Time Saved |
|---|---|---|---|
| 60 kWh (Model Y, Polestar 2) | 5-6 hours | 4-5 hours | ~1 hour |
| 75 kWh (ID.4, Ioniq 5) | 6-7 hours | 5-6 hours | ~1.5 hours |
| 130 kWh (Rivian, Lightning ER) | 11-12 hours | 9-10 hours | ~2 hours |
The 80% rule everyone forgets
Here’s where things get confusing, and it trips up nearly everyone. Your 30A charger doesn’t actually pull 30 amps continuously. It draws only 24 amps in real use. A 40A unit draws 32 amps sustained. This safety buffer, mandated by the National Electrical Code Article 625, keeps wires cool and your home protected from thermal overload. EV charging counts as a continuous load because it runs for hours without stopping. The NEC requires circuits to be rated at 125% of the continuous current. That’s why breaker sizes jump higher than you’d expect. A 30A charger needs a 40A breaker minimum, and a 40A charger requires 50A.
Does Your Car Even Want 40 Amps?
Your car’s onboard charger is the real boss
Many EVs max out at 7.2 to 11 kW on Level 2 AC charging, no matter what you plug them into. Plug-in hybrids and older EVs often accept only around 7 kW, making a 40A charger complete overkill. The Chevy Bolt, Nissan Leaf, and standard-range Tesla Model 3 all top out around 7.2 kW. Premium models like the Tesla Model Y Long Range, Polestar 2, and certain BMW i4 trims can handle 9 to 11 kW. If your car’s onboard charger can’t accept more than 7 kW, spending extra on a 40A setup gains you absolutely nothing.
Popular EV Acceptance Rates:
- Nissan Leaf: 6.6 kW max
- Chevy Bolt EV: 7.2 kW max
- Tesla Model 3 Standard Range: 7.7 kW max
- Tesla Model Y Long Range: 11.5 kW max
- Ford Mustang Mach-E: 10.5 kW max
- Rivian R1T/R1S: 11.5 kW max
The simple rule you can use tonight
If your car accepts 7 kW or less, 30A and 40A feel nearly identical in daily use. If your EV handles 9 to 11 kW, that 40A setup shortens your charge window noticeably and gives you flexibility on high-mileage days. Check your owner’s manual or the sticker inside your charge port. The maximum AC charging rate is listed right there. You can also search “[your car model] Level 2 charging rate” online. Knowing this number before you spend a dime on installation saves you from buying speed you’ll never use.
Future-proofing without regret
Your next EV might arrive with a bigger battery and faster acceptance rate. Industry forecasts suggest 11 kW onboard chargers will become standard by 2027, especially for battery electric vehicles with 75+ kWh packs. Wiring upgrades cost significantly more later than getting it right the first time. Many adjustable chargers let you start at 30A today and dial up to 40A when you upgrade your car. Installing thicker wire now (even if you set the charger to 30A) means you won’t need to tear open walls and conduit in three years when you buy that Rivian or Lightning.
What Your Home’s Electrical System Can Handle
The 125% breaker rule, explained like a friend would
EV charging counts as a continuous load because it runs for hours without stopping, generating sustained heat in the wiring. The National Electrical Code mandates a 125% safety margin to prevent wires from overheating. A 30A charger needs a 40A breaker minimum. A 40A charger requires a full 50A circuit. Your panel might already be stretched thin if your home was built before 1990 or if you’ve added central air, an electric range, or a hot tub since the original construction. That seemingly small jump from a 40A to a 50A circuit is often the specific threshold that pushes aging 100A or 125A panels beyond their safe capacity, triggering the need for a full panel upgrade.
“I’ve seen too many homeowners assume their panel can handle anything, only to discover during the permit inspection that they’re maxed out. A professional load calculation before you buy the charger saves you thousands in surprise costs.” – Licensed Electrician, 18 years residential experience
Breaker and wire pairings most installers use
A 40A breaker typically pairs with 8 AWG copper wire for runs under 100 feet. A 50A circuit needs thicker 6 AWG copper wire. Verify exact requirements with your electrician before buying anything, because distance from panel to garage multiplies wire costs fast. Longer runs (over 75 feet) may require stepping up to even thicker wire to prevent voltage drop. Copper is the preferred material over aluminum due to superior conductivity, lower resistance, and better long-term durability. Aluminum wire is cheaper but requires special handling and larger gauge sizes to carry the same load safely.
| Circuit Size | Wire Gauge (Copper) | Typical Use | Approximate Cost per Foot |
|---|---|---|---|
| 40A | 8 AWG | 30A charger (24A sustained) | $1.50-$2.50 |
| 50A | 6 AWG | 40A charger (32A sustained) | $2.50-$4.00 |
| 60A | 6 AWG (short run) or 4 AWG (long run) | Future 48A charger (11 kW) | $3.50-$6.00 |
What to do when your panel feels maxed out
Many modern chargers let you cap amps inside the smartphone app. You can start at 32A if capacity is tight, then increase later without rewiring. Smart load-management systems juggle your home’s power demand automatically, temporarily reducing the charger’s output when your oven or dryer kicks on. This prevents tripped breakers and lets you install a 40A charger even on a stressed panel. A load management system costs $200 to $800 for the hardware plus $250 to $500 for installation. That’s far cheaper than a full panel upgrade, which adds $1,500 to $4,000 to your project and may require a new service line from the utility pole.
The Real Costs Nobody Warns You About
Hardware prices for quality 30A and 40A units
Reputable Level 2 chargers range from $400 to $700 for residential use. The 10 amp jump from 30A to 40A capability rarely costs more than $100 to $200 extra in hardware alone. Look for adjustable models with a 16 to 50 amp range so you’re not locked into one setting forever. Many come with built-in ground-fault protection, which means one less component your electrician needs to install. Wi-Fi connectivity, scheduling features, and energy monitoring add another $50 to $150 but pay dividends if you’re on time-of-use electricity rates.
Installation realities most homeowners face
A simple 30A install near your panel costs $250 to $800 if a suitable circuit already exists or the panel has breathing room. A full 40A setup with new wiring from scratch runs $1,000 to $2,500 depending on distance, conduit requirements, and local labor rates. Panel upgrades tack on another $1,500 to $4,000 to the total bill. Concrete walls, finished basements, and long outdoor runs drive costs up fast. Trenching for underground conduit can add $500 to $1,500 alone. Always get three quotes from licensed electricians who specialize in EV installations and pull proper permits.
| Installation Scenario | 30A Setup Cost | 40A Setup Cost | Key Cost Driver |
|---|---|---|---|
| Simple (panel has room, short run) | $250-$800 | $400-$1,000 | Minimal materials, quick labor |
| Standard (new circuit, moderate distance) | $800-$1,500 | $1,200-$2,000 | Wire cost, conduit, labor hours |
| Complex (panel upgrade needed) | $2,000-$4,000 | $2,500-$6,000 | New panel, service upgrade, permits |
Rebates and hidden savings that soften the blow
The federal tax credit covers up to $1,000 of qualified installation costs for EV charging equipment installed at your primary residence. Many utilities kick in $500 to $4,200 for panel upgrades or charger purchases through demand-response programs. Some states offer additional rebates for low-income households or multi-unit dwellings. Check the Database of State Incentives for Renewables & Efficiency (DSIRE) before you commit. These programs change fast and vary wildly by zip code. I’ve seen homeowners recover 40% to 60% of installation costs through stacked incentives when they did their homework first.
Your Daily Driving Life – When Speed Actually Matters
Monday through Friday: the typical week
Most drivers drain only 30% to 50% of battery capacity on workdays. The average American commute is 41 miles round-trip, which represents about 15 kWh of consumption in a typical EV. Even a 30A charger fully recharges that overnight with hours to spare, restoring 60 to 70 kWh in a 10-hour window. You’ll rarely notice the speed difference for routine commutes under 150 miles per day. Both setups wake you up to a full battery Monday through Friday without breaking a sweat.
Weekend road trips and “oh no” moments
You need a quick afternoon top-up before evening plans? A 40A charger delivers relief, adding 80 to 100 miles in three hours versus 60 to 75 miles on 30A. Long weekend getaway with a Sunday night return? That extra speed feels clutch when you pull in at 6 PM and need to leave again by 9 AM Monday. Emergency midday charge scenarios favor higher amperage, but they’re genuinely rare. If you’re plugging in overnight 6 to 7 nights per week, the speed difference evaporates. If your schedule is erratic with frequent midday charging needs, 40A buys you real flexibility.
Two-EV households play by different rules
A single 30A charger barely handles two cars if you’re alternating nights and both vehicles see heavy use. Load-sharing systems split available power between two chargers on one beefy circuit, preventing overload. Most families with two EVs eventually install separate circuits rather than juggling one charger. Plan ahead if that’s your household trajectory within three years. Wiring for two 40A circuits upfront costs less than retrofitting later, and it eliminates the nightly “whose turn is it?” debate.
The Hidden Factors That Mess With Your Charging Speed
Temperature swings affect charging more than you think
Cold winters slow all Level 2 speeds significantly, regardless of amperage. Lithium-ion batteries accept charge reluctantly below 40°F, and your car’s thermal management system diverts power to warm the pack before charging ramps up. Both 30A and 40A suffer equally in frigid conditions. Hot batteries self-limit to protect longevity. Your EV’s battery management system throttles incoming power automatically when cells exceed safe temperatures. Climate can matter more than the 10 amp difference in extreme weather, especially in Phoenix summers or Minnesota winters.
Battery health vs. charging speed – the long game
Slower charging generates less heat over years of daily use, which theoretically favors long-term battery health. Your EV’s sophisticated battery management system controls final speed anyway, tapering current as the pack approaches full to prevent stress. Gentler charging (30A versus DC fast charging at 150 kW) absolutely favors longevity. The difference between 30A and 40A Level 2 charging? Negligible in terms of battery degradation. Both are considered gentle compared to public fast chargers that pump in 50 to 350 kW.
Safety Must-Knows You Should Not Skip
Follow the manual and breaker mapping religiously
A 48A output charger needs a 60A breaker per manufacturer guidance and NEC Article 625. Tesla Wall Connectors, ChargePoint Home Flex, and others publish specific breaker requirements in their installation manuals. For a 40A output unit, match charger settings and breaker size exactly. Never improvise with electrical work. It’s your home, your family, and your largest financial asset at stake. Undersized breakers trip constantly and overheat terminals. Oversized breakers fail to protect wiring, creating fire risk.
Critical Safety Checklist: ✓ Hire a licensed electrician with EV installation experience ✓ Pull proper permits (required in most jurisdictions) ✓ Install charger on a dedicated 240V circuit (no sharing with other loads) ✓ Verify ground-fault protection (built-in or separate GFCI breaker) ✓ Label breaker clearly at the panel ✓ Test installation with full-load charging before signing off
Dedicated circuit plus proper ground-fault protection
NEC Article 625 requires electric vehicle supply equipment on dedicated branch circuits with no other loads sharing the wire. Many wall connectors have built-in ground-fault circuit interrupter (GFCI) protection. Outdoor installs may need extra protection depending on local code. Your licensed electrician pulls permits and ensures code compliance down to the last detail. Never DIY electrical work of this magnitude. The permit inspection catches dangerous mistakes before they become house fires or electrocution hazards.
Choosing Between 30A and 40A – Your Simple Decision Tree
Pick 30A if this sounds like you
You have predictable daily driving under 40 to 50 miles with a reliable overnight charging routine. Your budget is tight and your current 100A or 125A panel has minimal breathing room for new loads. Your car’s onboard charger maxes out around 7 kW anyway, so faster infrastructure delivers zero benefit. You plan to stay in this home short-term (under 5 years) and won’t recoup installation costs through resale value. The 30A option minimizes upfront expense and fits the vast majority of single-EV households perfectly.
Go with 40A when these apply
Your irregular schedule needs flexibility for fast afternoon turnarounds before evening commitments. You’re eyeing a second EV purchase within 2 to 3 years and want infrastructure ready. Your car accepts 9 to 11 kW and you consistently drive high daily mileage (100+ miles). Your panel is a modern 200A service with at least 50A of available capacity confirmed by load calculation. You value future-proofing against the industry’s shift toward 11 kW standard onboard chargers by 2027.
The adjustable charger compromise that buys you time
Install 40A-capable wiring (6 AWG wire, 50A breaker) now, but set the charger itself to 30A output to match your panel’s current capacity. This strategy runs lower current through thicker wire, reducing heat and stress on all components. Upgrade the charger’s software settings later when your needs or budget change, without touching a single wire. You save money upfront by avoiding load management systems or panel upgrades while keeping future options wide open. This approach is what experienced electricians recommend most often for homeowners on the fence.
Your Personal Charging Calculator – Making It Click
The formula that answers your question
Take your daily miles driven and multiply by 2 to find the overnight range you need as a safety margin. A 30A charger delivers roughly 200 to 220 miles per 10-hour night. A 40A unit pushes 250 to 280 miles in that same window. Factor in your worst-case driving day, not your average Tuesday commute. If you occasionally drive 180 miles in a day, a 30A charger leaves you cutting it close. A 40A setup gives you breathing room.
| Daily Mileage | Battery % Used (60 kWh EV) | 30A Overnight Recovery | 40A Overnight Recovery | Recommended Setup |
|---|---|---|---|---|
| 30 miles | ~15% | Full recovery in 2 hours | Full recovery in 1.5 hours | Either works |
| 60 miles | ~30% | Full recovery in 3-4 hours | Full recovery in 2.5-3 hours | Either works |
| 100 miles | ~50% | Full recovery in 5-6 hours | Full recovery in 4-5 hours | Either works |
| 150 miles | ~75% | Recovery in 8-9 hours | Full recovery in 6-7 hours | 40A safer |
| 200+ miles | Near full depletion | May need 12+ hours | Recovery in 9-10 hours | 40A or higher |
Quick self-quiz to find your fit
How many miles do you drive on your busiest day? If it’s under 100 miles and predictable, 30A handles it easily. Do you charge overnight 6 to 7 nights per week, or do you need midday boosts frequently? Overnight charging favors either option; irregular charging demands higher speed. Is a second EV arriving in your driveway within three years? If yes, think bigger now. Does your car accept more than 7 kW on Level 2? Check the owner’s manual right now. If your onboard charger caps at 7 kW, save your money and go 30A. If it accepts 9+ kW, the 40A investment pays dividends daily.
Conclusion – The Charge Decision That Sets You Free
For most single-EV households with predictable routines, 30A is more than enough and saves real cash on installation. If your car accepts high power (9+ kW), you drive hard, or you’re planning ahead for a second vehicle, 40A cuts stress and shaves wait time on those occasional tight turnarounds. Either choice beats the chaos of hunting public chargers at inconvenient times. You’ll love the freedom of plugging in at home, walking inside, and forgetting about it until morning.
One last piece of advice from someone who’s been there
Don’t overthink this decision. Your car charges while you sleep, not while you watch the percentage tick up. Verify your car’s onboard charger limit before spending extra on speed you physically can’t use. Trust your gut, check for local and federal rebates that can recover 30% to 50% of costs, and get a licensed electrician to pull the permits and do the load calculation. Then enjoy the ride. You’ve made a smart move going electric. The right home charger just makes that decision even sweeter every single morning.
30A vs 40A EV Charger (FAQs)
What size breaker do I need for a 40 amp EV charger?
A 40 amp EV charger requires a 50 amp circuit breaker due to the NEC’s 125% continuous load rule. The charger will draw 32 amps sustained (80% of its rated 40A output), and the breaker must be sized at 125% of that continuous load.
Never install a 40A charger on a 40A breaker. The breaker will overheat and trip repeatedly, creating a safety hazard. Your electrician will use 6 AWG copper wire rated for 50 amps to complete the circuit safely. Always follow the manufacturer’s installation manual and local electrical codes.
How long does a 30 amp charger take to charge a Rivian R1T?
A Rivian R1T with the large 135 kWh battery pack takes approximately 22 to 24 hours to fully charge from empty using a 30 amp (5.8 kW actual output) Level 2 charger. Most owners never fully deplete the battery, so a typical overnight charge from 30% to 80% takes around 11 to 13 hours.
This makes 30A charging impractical for Rivian owners with high daily mileage. A 40 amp (9.6 kW) charger cuts that full charge time to roughly 15 to 16 hours, and an 80% overnight top-up completes in 8 to 9 hours. Rivian owners with the Standard battery pack (110 kWh) fare slightly better but still benefit significantly from 40A or higher charging.
What wire gauge do I need for a 40 amp EV charger installation?
You need 6 AWG copper wire for a 40 amp EV charger because the charger requires a 50 amp circuit breaker, and 6 AWG copper is rated to safely carry 50 amps for residential applications. For shorter runs under 60 feet, 6 AWG provides adequate ampacity with minimal voltage drop.
Longer distances (over 75 feet) may require stepping up to 4 AWG to prevent excessive voltage drop that could slow charging speeds. Always use copper wire rather than aluminum for EV charging circuits due to copper’s superior conductivity and safety characteristics. Your electrician will verify the correct gauge based on the specific distance from your panel to the installation location.
Can I use a 30 amp charger on a large battery electric truck like the Ford Lightning?
You can physically use a 30 amp charger on a Ford Lightning, but it’s not practical for daily use. The Lightning Extended Range model has a 131 kWh battery pack that would take approximately 23 to 25 hours to charge fully from empty on a 30 amp (5.8 kW) charger. Even charging from 20% to 80% requires about 14 to 16 hours.
If you drive less than 40 miles per day and can plug in every single night for 10+ hours, a 30A charger can technically work. However, most Lightning owners find 40 amp charging (9.6 kW) to be the minimum practical option, which reduces full charge time to around 15 to 17 hours and overnight top-ups to a manageable 9 to 11 hours. For true convenience, many Lightning owners opt for 48A (11.5 kW) chargers on 60A circuits.
Do I need to upgrade my electrical panel to install a 40 amp charger?
Whether you need a panel upgrade depends on three factors: your current panel’s total capacity (100A, 150A, or 200A service), how much of that capacity is already being used by existing appliances, and whether the panel physically has space for a new 50A breaker.
Homes with modern 200A panels and moderate existing loads typically handle a 40 amp charger without upgrades. Older homes with 100A or 125A panels often require either a full panel upgrade ($1,500 to $4,000) or installation of a smart load management system ($450 to $1,300 total) to safely accommodate the new 50A circuit.
Schedule a professional load calculation with a licensed electrician before purchasing your charger. This $100 to $200 assessment identifies whether your panel can safely handle the additional load or if upgrades are necessary.